


Disclaimer: This post assumes you have a fundamental knowledge of PySpark (the Python API for using Spark), but if you’re comfortable with the Pytest framework with vanilla Python then you should be comfortable navigating through this too. I will invest more time into Spark-related posts in the future so look out for that!
Introduction
I’m sure you’ve heard over and over again how important data quality is when you build data pipelines, through videos, in meetings, or through personal experiences with your own ETL pipeline issues. But let’s consider another approach with a quick analogy:
Quick Analogy: Safety tests for Flight
Imagine boarding an aeroplane and settling into your seat. As the pilots are preparing for take-off, the flight attendants forget to run through the usual safety procedures with the passengers. This might make you feel uneasy but you decide to overlook it for now.
But as the plane steers towards the runway, the pilot makes a last-min announcement “Ladies and gentlemen, we regret to inform you that due to our tight schedule, we were only able to conduct 3 safety checks for this flight unfortunately. This includes checks on the flight engine, fuel level, wings and weather conditions of our flight journey, among others. We had to prioritize other flights due to the tight schedules under this airline. We’re not entirely sure what may happen during this journey but we hope to reach our destination safely”.
As the plane accelerates and lifts into the air, you notice a large dent in one of the wings. Your anxiety now grows as you realize this was one of the safety checks that were missed.
As you reach 30,000 feet above ground level, one of the flight attendants near the emergency exit screams to another flight attendant “we forgot to fully lock the emergency exit and it looks like it's loosening”. At this point, you realize your safety is at high risk all due to incomplete safety checks.
So…?
These sequences of events are unlikely to occur in your lifetime, but I’m sure you get the spirit of the message here. As engineers, we have an ethical responsibility to conduct thorough data quality checks in the pipelines to ensure they are production-grade.
Data quality tests are written to confirm our production pipelines are free of any dirt, miscalculations or unexpected behaviours.
They prove our solutions operate the way we expect them to. Stakeholders make key business decisions on our solutions, which could result in unintended consequences if they are truly not fit for purpose.
Pytest
This is a Python-based framework for creating a library of custom quality assurance checks on data. It’s handy for interrogating the data quality level of ETL pipelines before they're deployed to production.
The official GitHub repository can be found here.
Installing pytest
To install Pytest to your cluster,
Go to Compute
Click on the cluster of your choice
Click on Libraries tab
Click on Install new
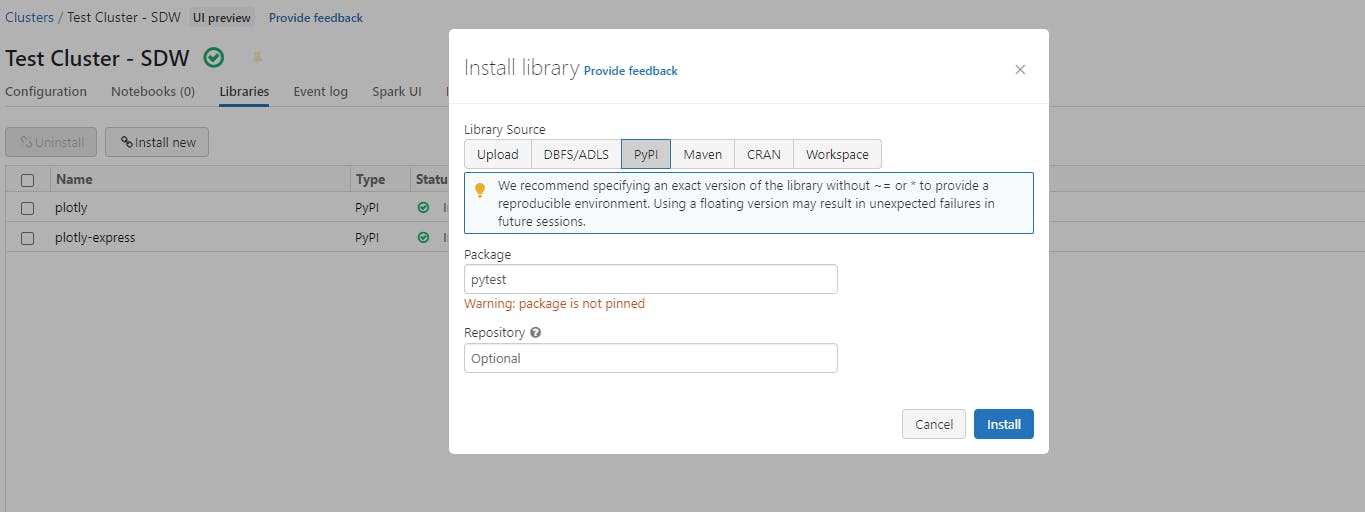
Under Library Source click on PyPI
Enter pytest in the Package field
Click Install
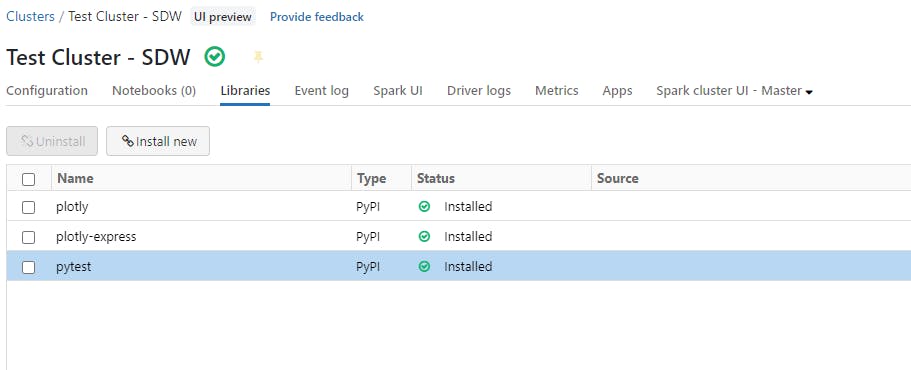
Your console should be similar to this once done:
Steps
1. Create your DQ workspace
You would need to have configured Databricks Repos with Git. If you haven't, follow the guide I wrote here to prepare you for this step.
Enter Databricks Repos
Create a folder for tests in the repository where your Spark scripts reside
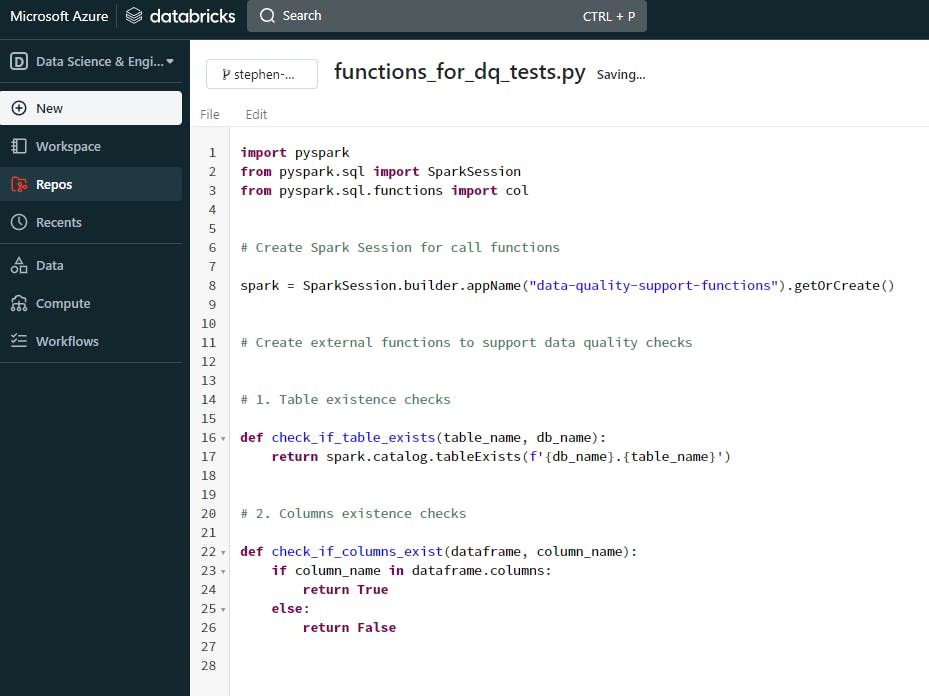
First, add a .py file for registering the functions to support some of the DQ tests and provide it with a name like “functions_for_dq_tests.py” (as I’ve done in my example below). You can provide it with any name of your choice
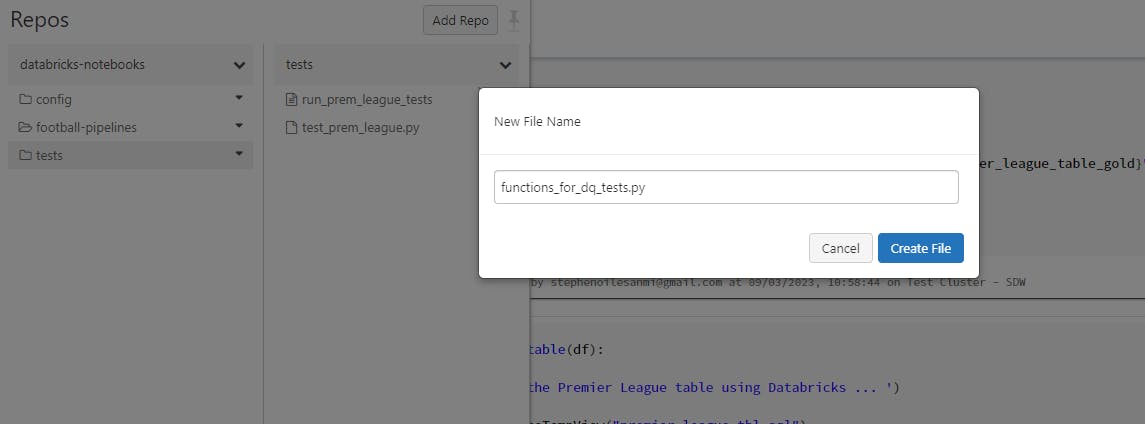
- Then add another .py file for the DQ tests. Each pytest script must contain a “test_” prefix for the filename so that pytest can locate it to run the tests e.g. test_sales.py
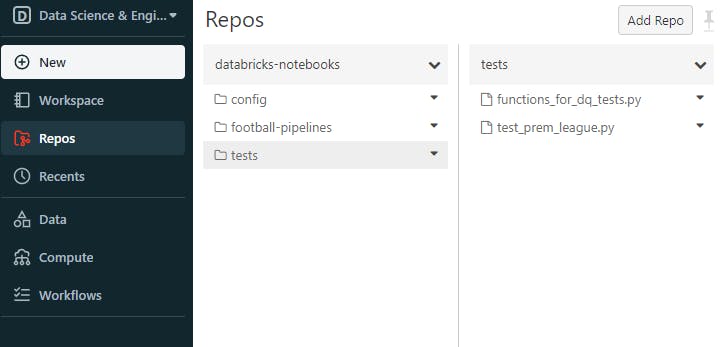
Your folder should look similar to this:
2. Write support functions for your DQ tests
These functions are designed to aid the actual data quality tests. They will be stored in the functions file we created in the second to last step of the previous stage, then we can call this file as an external module into our base pytest script.
In this scenario, we will create a few and use one of them for the DQ tests.
Open your functions file in your Databricks Repos repository
Add the modules required for creating the functions
Create a Spark Session for the file. (Side-note: In Databricks only notebooks have Spark Sessions automatically configured, other file formats created in Databricks require you to explicitly set it up and initialize them)
Add the functions required needed for the tests
Here's what your file should look similar to:
3. Write your DQ tests
Open your “test_xxxx.py” file in your Databricks Repos repository
Add the modules required for the tests
Create a Spark Session for the DQ tests.
Add the DQ tests to the script as pytest functions, like so:
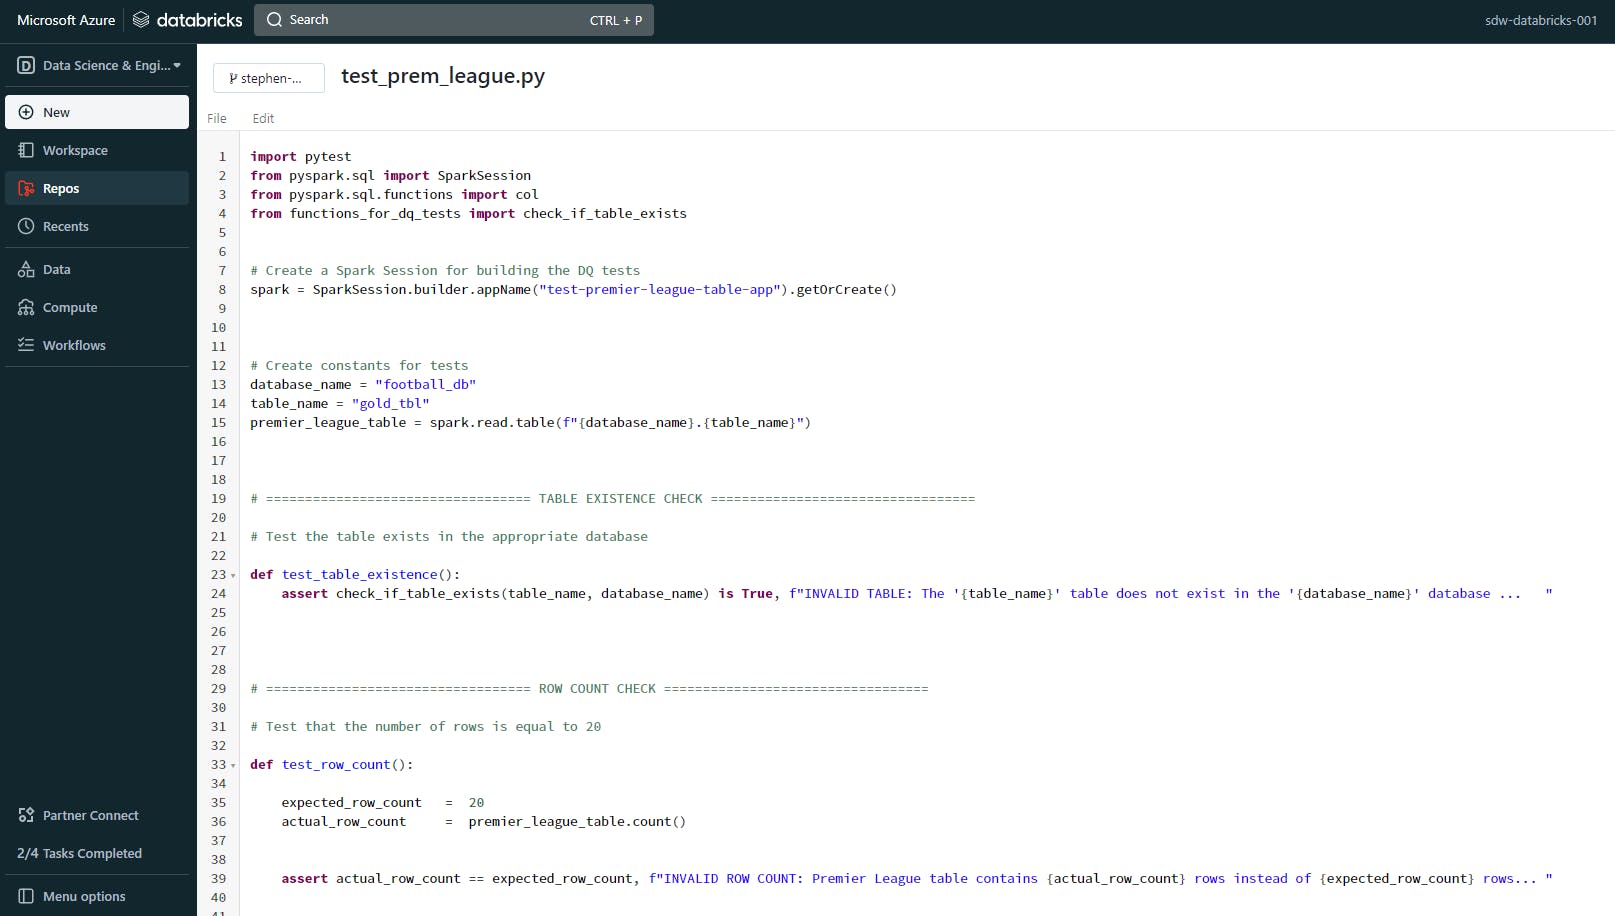
Note: Remember to write the pytest functions with the prefix “test_” so that the program recognizes and executes the tests in the next stage.
4. Execute your tests
Create a new workbook in the same folder as your tests.
If you haven’t installed pytest to your cluster, enter the following code into the 1st cell of your notebook:
pip install pytest
- Add the following PySpark code block to the 2nd cell of your notebook:
import pytest
import os
import sys

repo_name = "<my-repo-name>"

# Get the path to this notebook, for example "/Workspace/Repos/{username}/{repo-name}".
notebook_path = dbutils.notebook.entry_point.getDbutils().notebook().getContext().notebookPath().get()

# Get the repo's root directory name.
repo_root = os.path.dirname(os.path.dirname(notebook_path))

# Prepare to run pytest from the repo.
os.chdir(f"/Workspace/{repo_root}/{repo_name}")
print(os.getcwd())

# Skip writing pyc files on a readonly filesystem.
sys.dont_write_bytecode = True

# Run pytest.
retcode = pytest.main([".", "-v", "-p", "no:cacheprovider"])

# Fail the cell execution if there are any test failures.
assert retcode == 0, "The pytest invocation failed. See the log for details."
Replace the
"<my-repo-name>"string with the name of your repository that contains the tests to therepo_nameobjectRun the notebook
Results
This is what my console delivers :
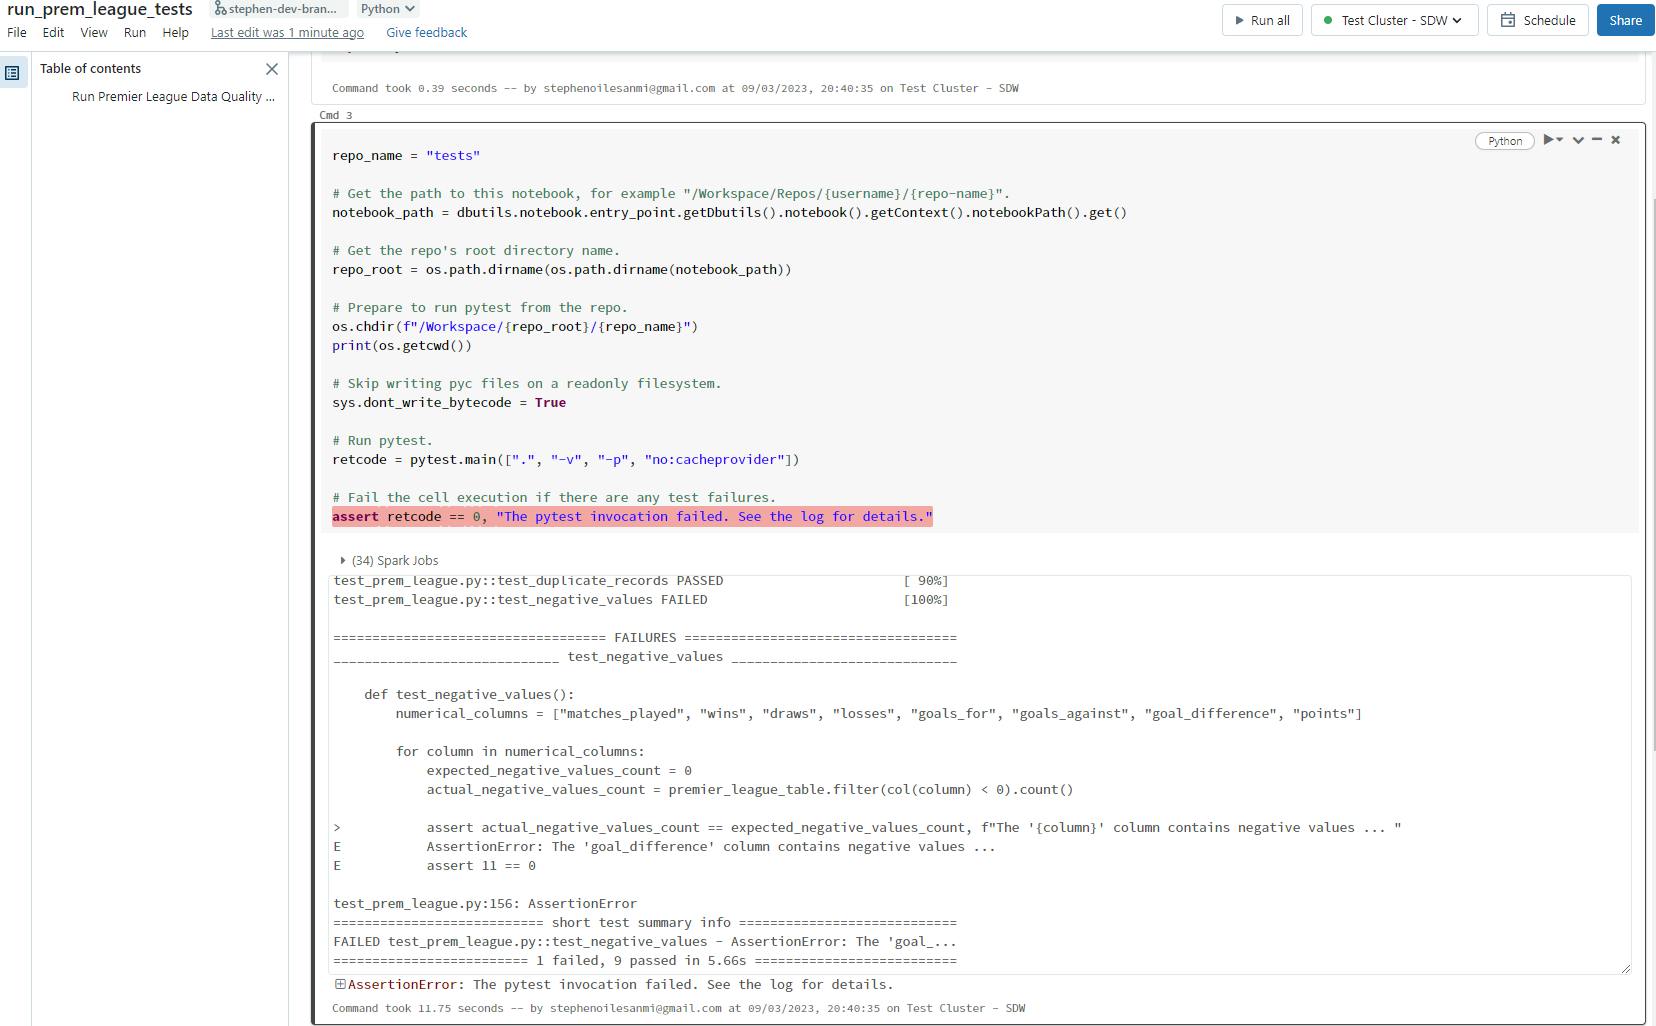
In this example, I am running my data quality checks on the Premier League table, which was produced by a micro-batch processing pipeline that sources data from my Python scraping tool and reads it into the data lake (AWS S3), which then is computed in Databricks using Spark.
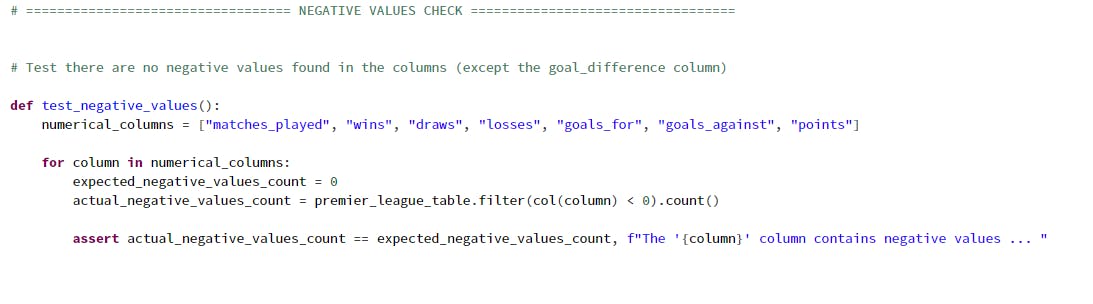
If you notice one of my data quality tests failed - this particular one was designed to flag any columns that contained negative values. In this case, it was the "goal_difference" column.
Here's the background test responsible for failing the test:

I designed this test to intentionally fail just to demonstrate what a failed test looks like in Databricks.
Resolution Workflow
The goal is to identify and address quality issues early at this stage. Once done, you can now apply the appropriate treatment for fixing them, like
retracing previous steps,
analysing data sources,
checking audit logs etc.
Once resolve you can keep stakeholders informed by sending them a data quality report that documents any issues encountered during testing.
Now I'll pretend these steps are taken in this one step:
I've removed the "goal_difference" column from this check to pass the tests, so let's rerun the main notebook to see the results...

Conclusion
After building your data pipelines, prioritizing writing tests is a great way to ensure their reliability and efficiency across the business. You can generate high-quality solutions by combining the Spark and pytest frameworks together similar to the examples I've walked you through, so I encourage you to try them if you haven't already.
In the future, I’ll dig into some of the cool testings features Pytest comes with (including launching data quality reports in the browser).
Feel free to reach out via my handles: LinkedIn| Email | Twitter