You can version control your Databricks notebooks by using Databricks Repos. Say goodbye to manually moving old notebooks you no longer use into a cruddy hard-to-manage folder in your workspaces!
All you need is your Git credentials to get it set up. Here's how:
Set up the Databricks and Git integration
Click on your username (or email) at the top right-hand of your screen
Click User Settings from the drop-down menu
Click on the Git integration tab
Select the Git provider of your choice (this blog post will pick GitHub among the available options)
Add the username or email of your Git provider e.g. sdw-online
Use the GitHub docs to create a personal access token and add it to the Token field
Click Save
Add an existing Git repository to Databricks
Go to Databricks homepage
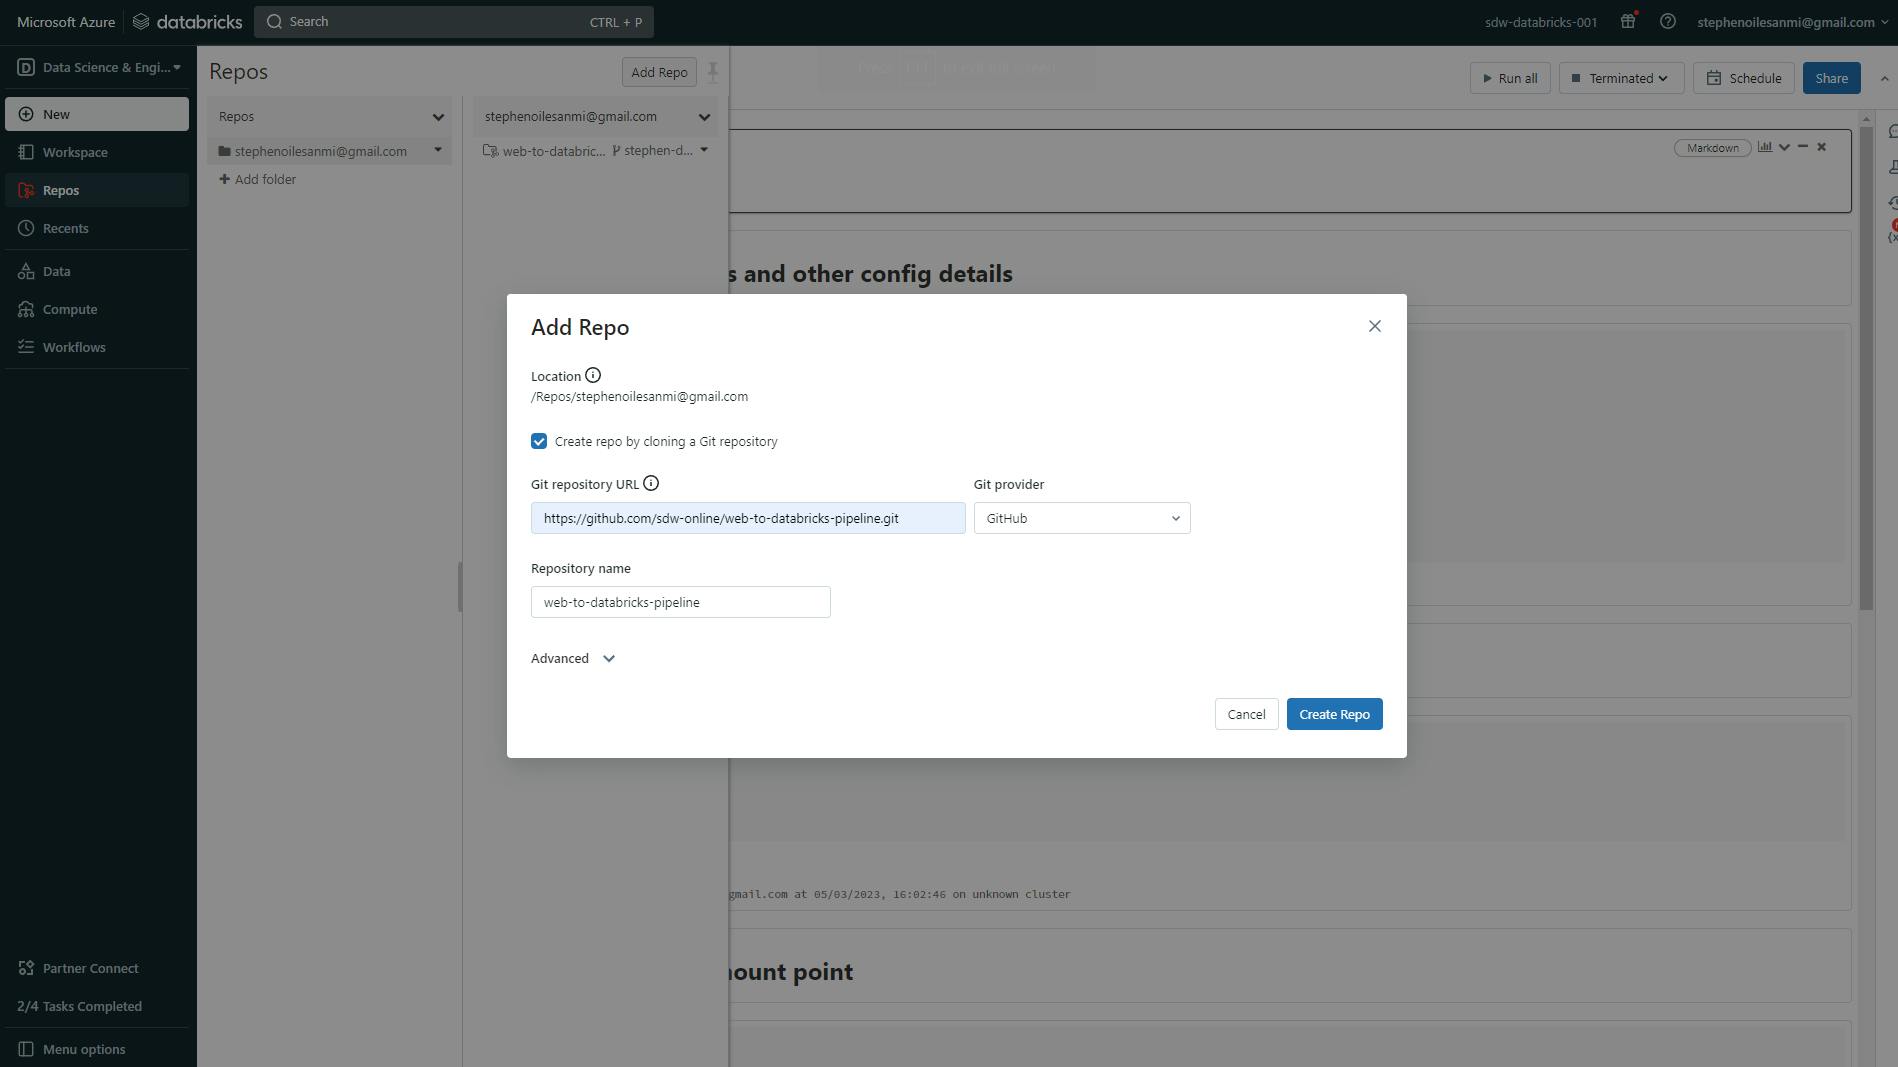
Go to the Repos icon in the navigation bar
Click on the Add Repo button
Check the box next to Create repo by cloning a Git repository option
Copy and paste the link of your Git repository into the Git repository URL field
Click Create Repo

Once you completed all the above steps, you should see your Git repo appear in the Repos section. You can create new notebooks or add existing ones to the Git repo.
Commit changes made in the notebooks to Git
You need the right or push commits to the repo before you can advance with this step. This should be set up while you're creating the personal access token under the Git integration section. Otherwise, you will bump into these error messages while committing changes:

Assuming you've made changes to your notebooks:
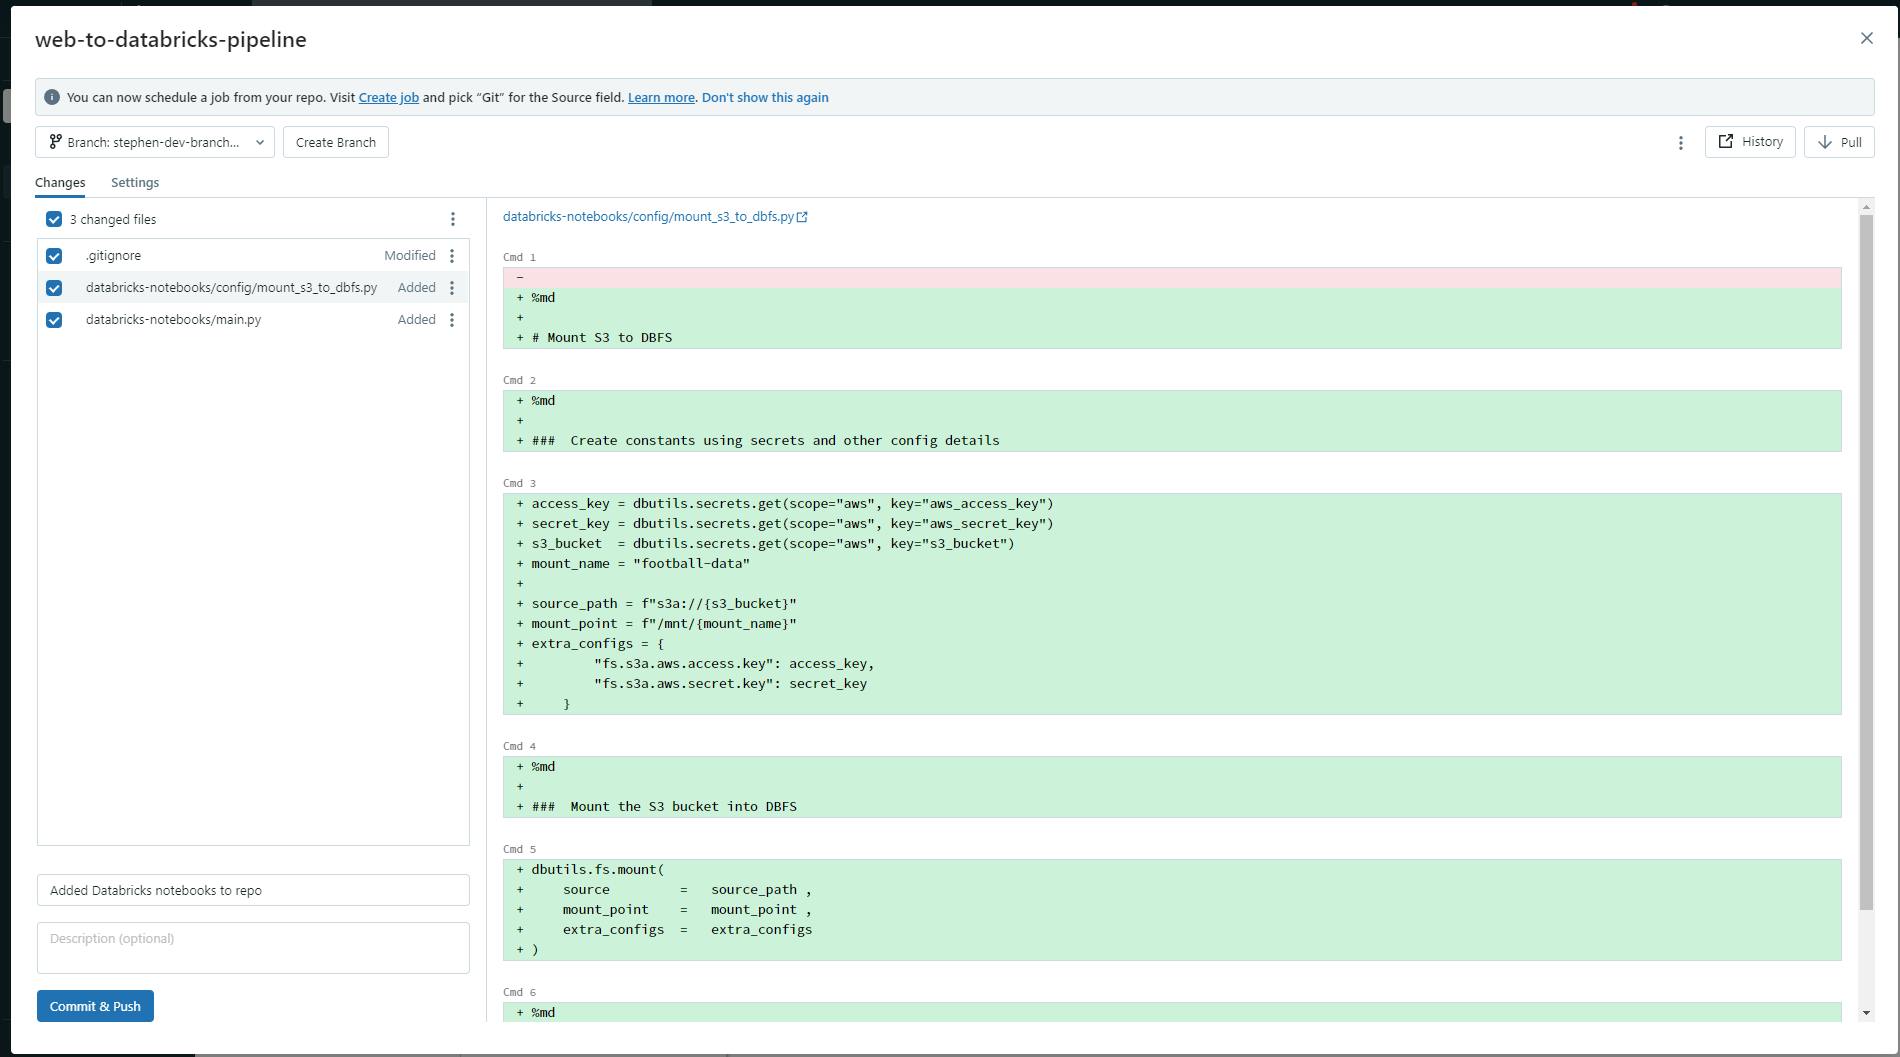
Click on Repos in the navigation bar and enter into your folders until you see your Git repo
Right-click on your Git repo and click on the Git… option
Review your changes made and select the changes you want to commit
Add a commit message
Click Commit & Push

Feel free to reach out via my handles: LinkedIn| Email | Twitter
