

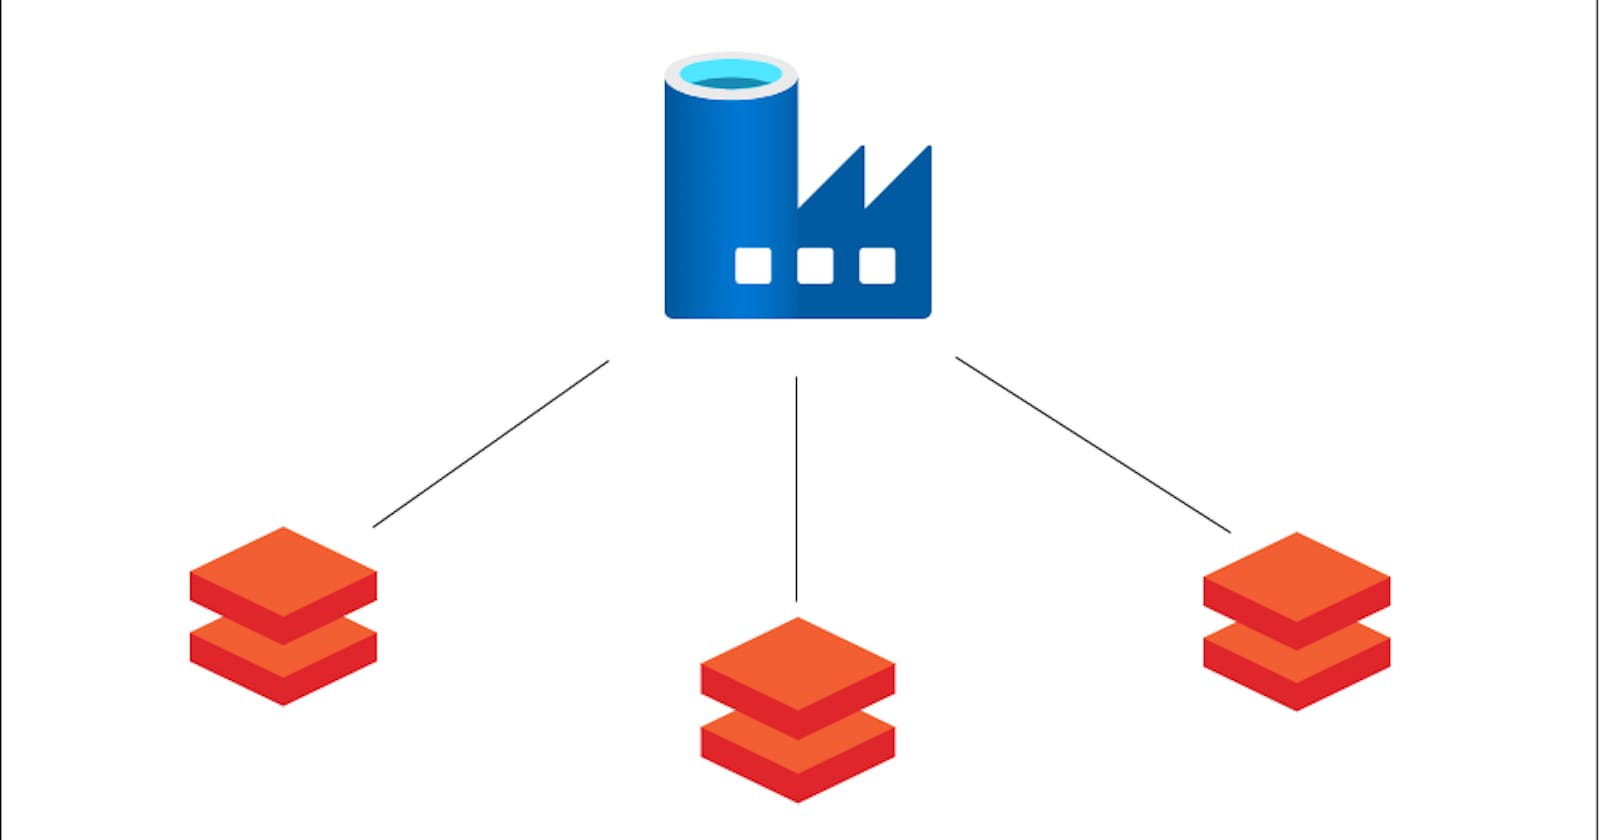


When orchestrating the workflow management of multiple Databricks notebooks, there are two tools provided to us by Azure:
Azure Data Factory
Databricks Workflows
The tool that manages the orchestration of multiple notebooks the easiest remains Azure Data Factory. This is due to the in-built features that have made it popular among data engineers for so long including its built-in alerting mechanism, easy execution ordering, and custom event triggers, among others. Not only is it commonly used for cloud data migration projects, it also remains a "go-to" technology for cloud orchestration tasks, even for technologies outside of the Azure ecosystem.
In this post I will show you how to create an Azure Data Factory pipeline that executes a Databricks notebook that contains logic for ingesting and performs transforming 3 CSV files. The 3 CSV files are located in my Blob container here:
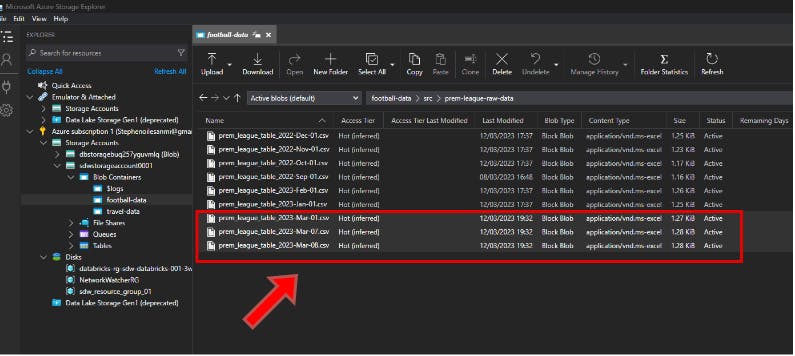
Each file contains 20 rows, so I'm expecting a total of 60 rows to be processed in Databricks once we're done. You can use this logic to schedule multiple Databricks notebooks in Azure Data Factory.
Steps
To enter Azure Data Factory,
In the search bar of the Azure portal homepage, enter Data factories
Click on Data factories
Click on the data factory of your choice, or create a new one
Click on Launch Studio on the Overview page
1. Create a linked-service
Click on the Manage tab
Under the Connections pane, click on Linked services
Click + New
Click on Compute tab
Click Databricks then click on Continue
Fill in all the appropriate details to configure linked-service (name, subscription, authentication type, access token )
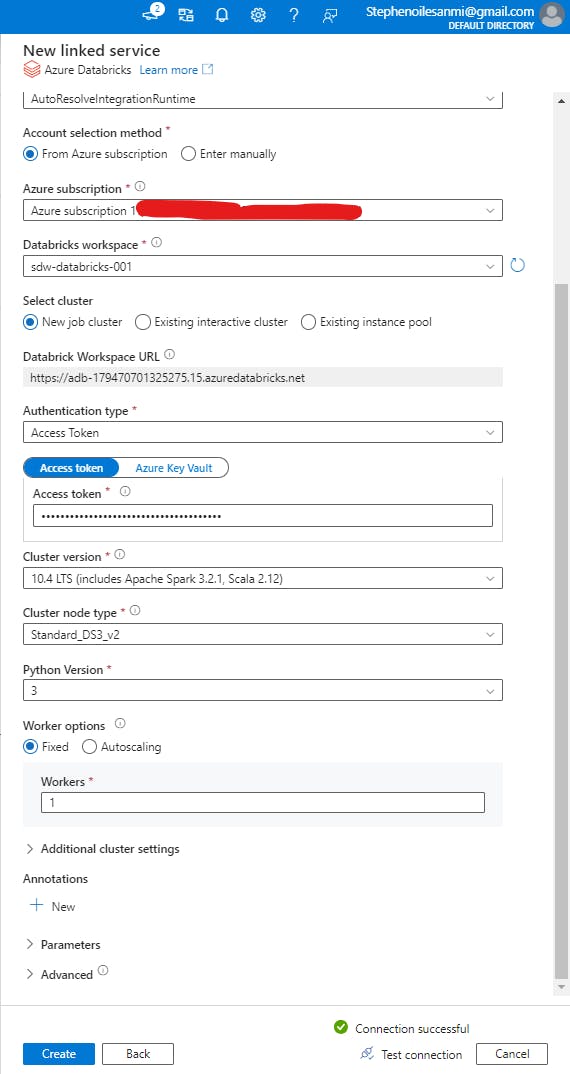
If the authentication type is access token, generate a personal access token in Databricks and paste it into the access token field in ADF
Click new job cluster for the select cluster option. This will spin up a new cluster to execute your Databricks notebooks every set period (as specified) and then terminate it once the job is completed
Click on Test connection to check if the credentials work as expected
Click Create
2. Create pipeline
Click on Author
Click on Pipeline
Click on New pipeline and enter a name for it
Under Databricks option in the Activities pane, drag and drop Notebook container into workspace
Enter name for container under General tab

Enter the Azure Databricks tab and click on the linked-service just created under the drop-down menu for Databricks linked service field
Enter Settings tab and add (or browse for) notebook path in the Notebook path field
Click on Validate all
Click on Publish all then click on Publish
3. Create trigger & monitor pipeline
Click on Add trigger
Click on Trigger Now
Click Ok
Click on View pipeline run
Once you’ve set up the trigger, you can monitor the progress of the pipeline. Here’s how:
Enter Monitor tab
Click Pipeline runs
Select pipeline just created
Hover over the pipeline and click the Details icon
Click the link displayed next to the Run page_url

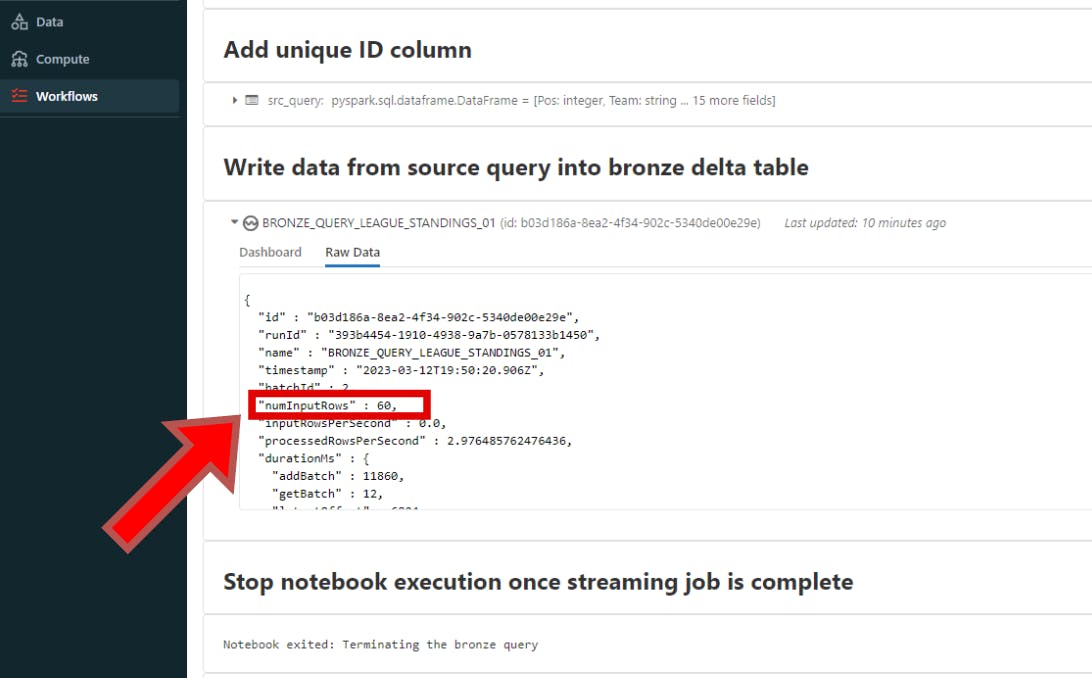
This should open up Databricks Workflow with the ADF job complete like this:
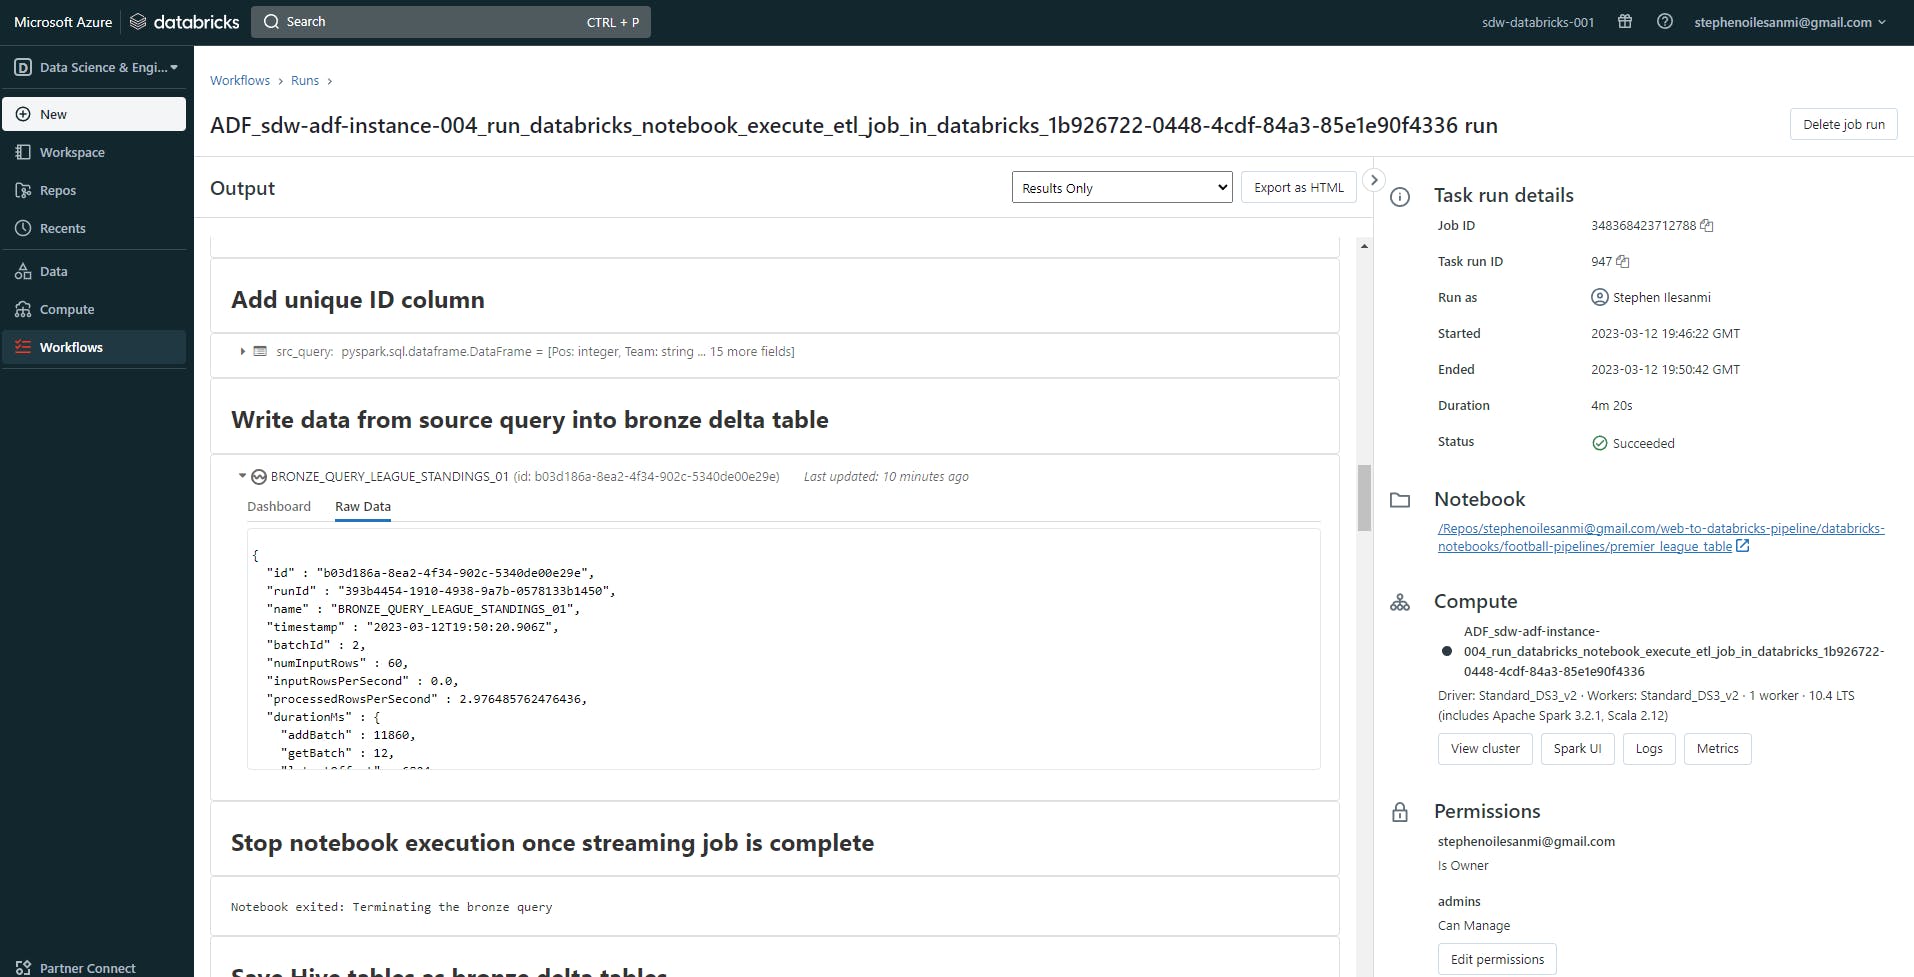
The structured streaming query in my Databricks notebook successfully ran courtesy of Azure Data Factory.
It managed to ingest the 60 rows and transform them as expected:
Feel free to reach out via my handles: LinkedIn| Email | Twitter