


Preface
Kafka is an open-source tool used for building real-time data processing pipelines.
Here’s how to download and set it up on your Windows machine.
In this tutorial, I will show you how to download and set up Kafka on your Windows machine.
Steps
Install Java & JDK
Set up environment variables
Install Kafka
Set up configuration files
Test Kafka
1. Install Java & JDK
To use Kafka, you must install Java and a Java Development Kit (JDK) on your machine. This is because Kafka is built using the Java programming language, and therefore requires a JDK to run.
A. Java
Enter “download Java” in your browser
Click on the first link from the official website
Click on Download Java then click on the downloaded file
Follow instructions from the Java installation wizard
B. JDK (Java Development Kit)
Enter “download Java Development Kit” in your browser
Click on the first link from the official website
Scroll to Java SE Development Kit 8u361 and then click on the Windows tab
Under the Download pane, click on the link for the x64 installer
You will need an Oracle account to advance with the installation step. Register if you don’t have one
Resume this step to tick the terms and condition checkbox and click on Download jdk-8xxx-windows-x64.exe
Click on the download file and follow the instructions from the JDK installation wizard
2. Set up environment variables
Search for edit the system environment variables page
Click on the Environment Variables button
Under System variables, click New
For the Variable name, enter JAVA_HOME
For the Variable value, enter the directory path where the JDK is stored

Once it looks like the above, click all the OK buttons until you exit the environment variables page
Enter the command (cmd) prompt and type java -version. You should get the latest version of java displayed like so:

3. Install Kafka
Enter “download Kafka” into your browser
Click on the first link from the official website. You should see the website is sorted by versions (the latest on top, earlier releases towards the bottom)
Under the latest version, click on the .tgz file next to Scala 2.13 under Binary downloads, which should download the latest Kafka version as a compressed file.
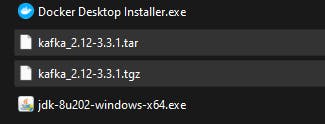
Unzip the .tgz file to get a folder named kafka_2.13-3.4.0.
Unzip the tar file in this folder too. Once you have this folder, copy and paste it to the root of your C drive
- Rename the folder to kafka
4. Set up configuration files
A. Server file
Enter the kafka folder created from the previous step
In the config folder, open the server.properties file in a notepad
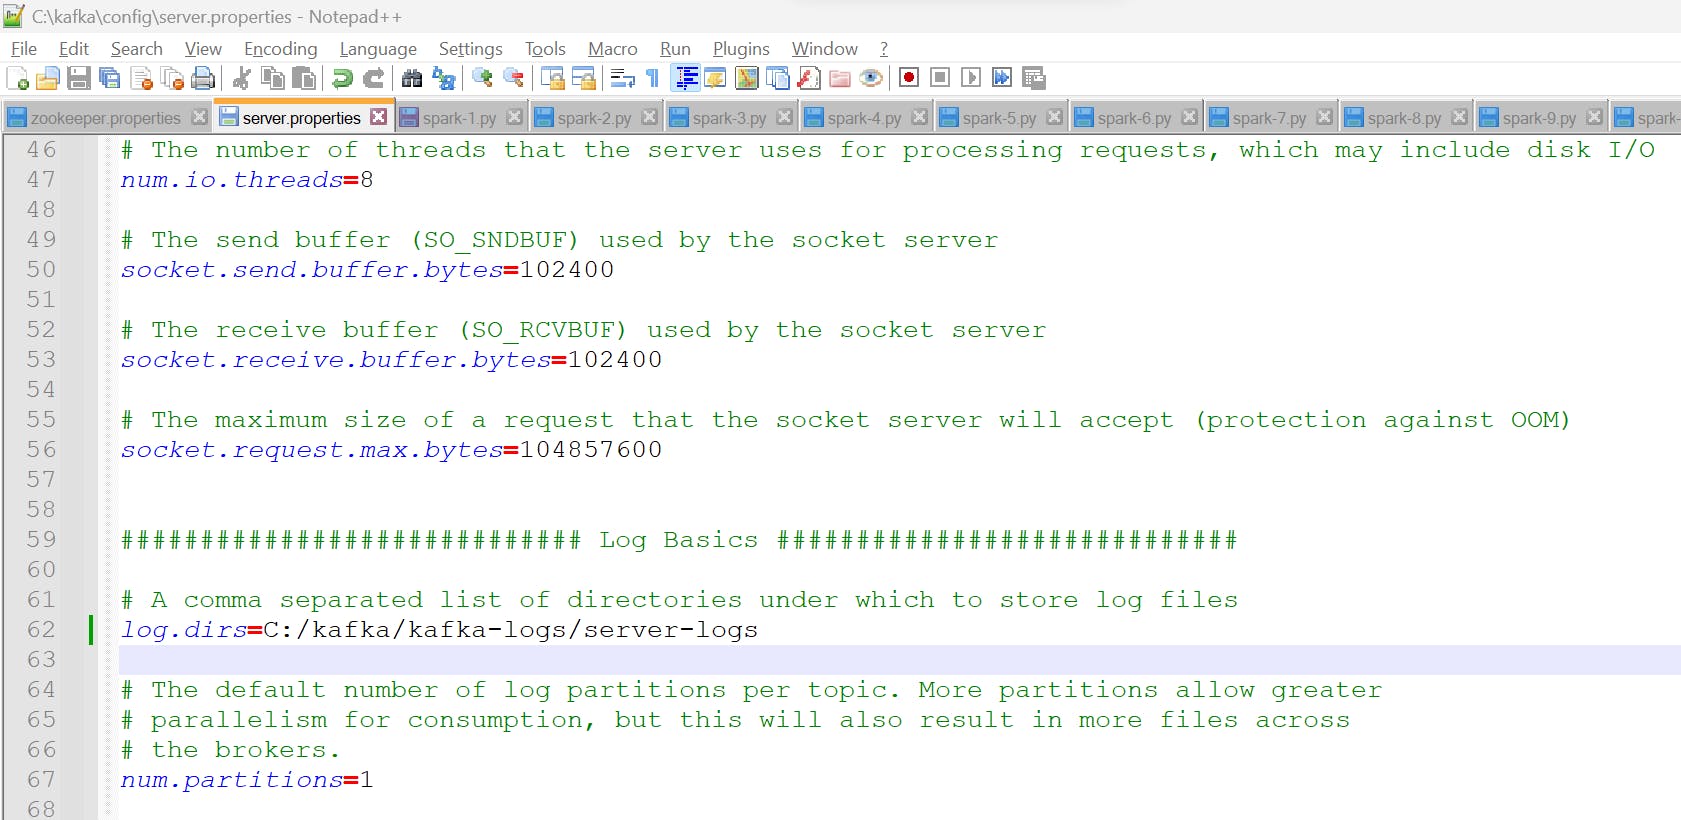
In the file replace “log.dirs=/tmp/kafka-logs” with “log.dirs=C:/kafka/kafka-logs/server_logs”
Save and exit the file.
B. Zookeeper file
- Return to the config folder and open the zookeeper.properties file in a notepad
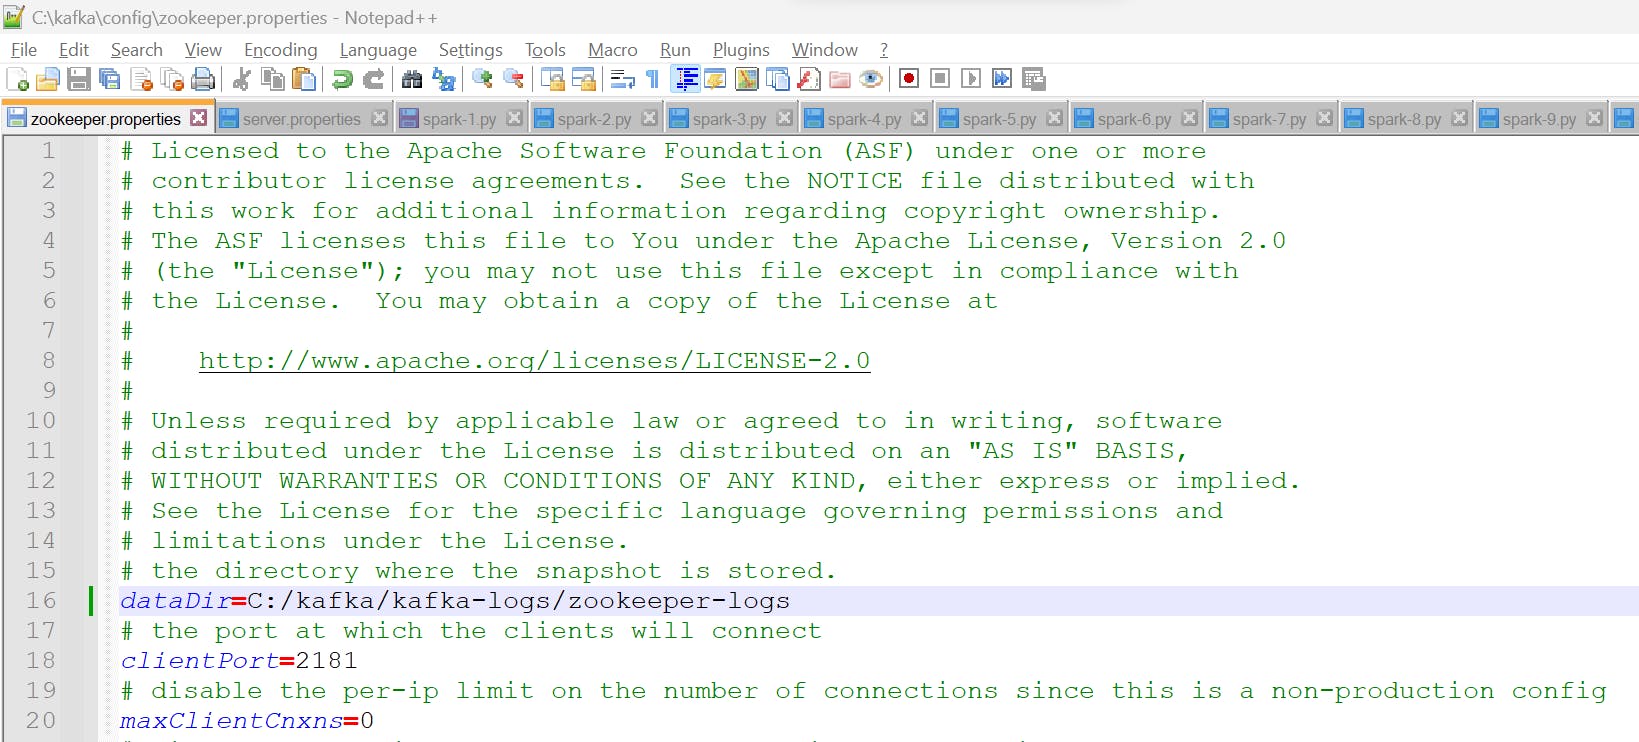
In the file replace “dataDir=/tmp/zookeeper” with “dataDir=C:/kafka/kafka_logs/zookeeper_logs”
Save and exit the file.
5. Test Kafka
Let’s confirm the installation and configurations worked by starting the Zookeeper and Kafka servers.
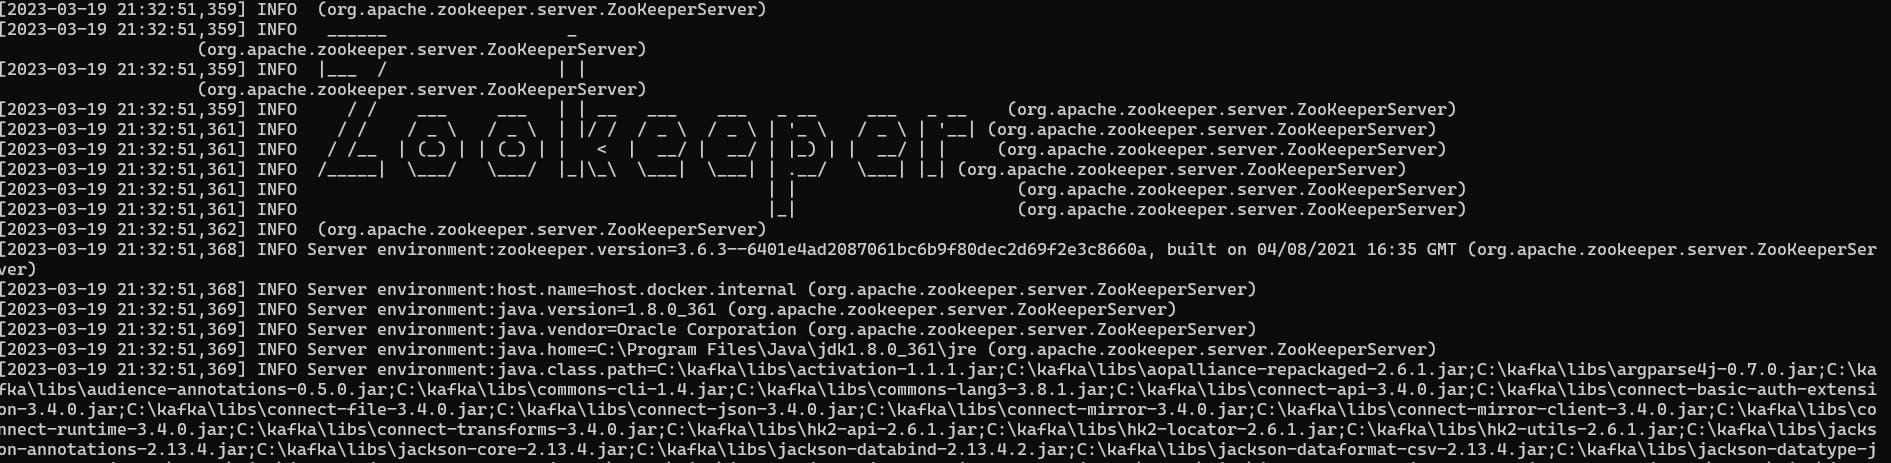
Start Zookeeper server
To start the Zookeeper server,
Open the command prompt
Type the following into the terminal:
C:\\kafka\\bin\\windows\\zookeeper-server-start.bat C:\\kafka\\config\\zookeeper.properties
This should activate the Zookeeper server like so:
Start Kafka server
To start the Kafka server,
Open a new command prompt
Type the following into the terminal:
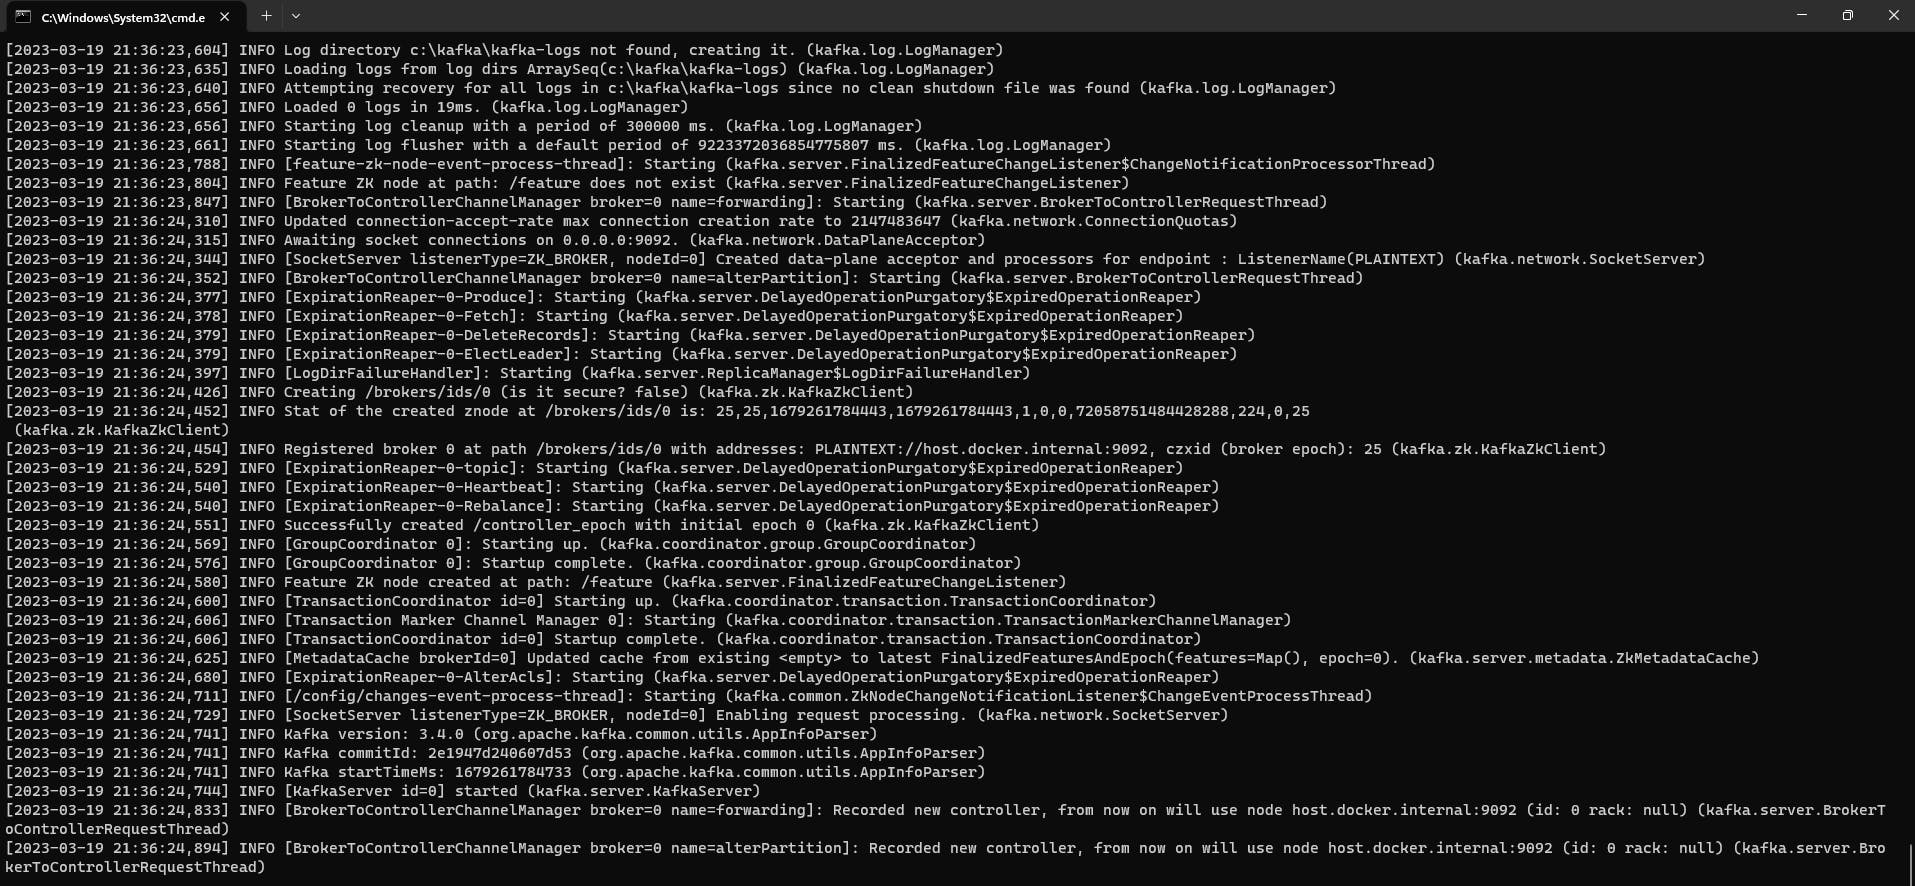
C:\\kafka\\bin\\windows\\kafka-server-start.bat C:\\kafka\\config\\server.properties
The Kafka server should be running in its terminal like so:
Once the servers are running, we can test if Kafka works by:
Creating a topic
Creating a producer
Creating a consumer
We’ll create a producer to send messages to the consumer. The consumer will subscribe to a topic we’ll name demo_topic, and the consumer will display the messages from the topic to the terminal as a validation check that the installation and configuration were successful.
In the commands below, we’ll replace <host>:<port> for localhost:9092 and <topic-name> for demo_topic.
1. Create a topic
Open a new command prompt
Enter the following command into the terminal:
C:\\kafka\\bin\\windows\\kafka-topics.bat --create --bootstrap-server <host>:<port> --topic <topic-name> --replication-factor <replication-factor-no> --partitions <partition-no>
The replications factor specifies the number of copies of each message which will be stored across multiple broker instances. If the main broker crashes or fails to send a message for any reason, another broker can step in to ensure the message is delivered to the appropriate topic without interruption. This is one of the features of Kafka that make it a fault-tolerance streaming tool.
The partitions are the number of chunks the messages are split into. Each topic can have multiple partitions, and each partition can be stored on different brokers, which adds to the scalability of the event processor.
This should return:

2. Create a producer
Open a new command prompt
Enter the following command into the terminal:
C:\\kafka\\bin\\windows\\kafka-console-producer.bat --broker-list <host>:<port> --topic <topic-name>
- Enter messages to send to the topic specified in the last step:
3. Create a consumer
Open the command prompt
Enter the following command into the terminal:
C:\\kafka\\bin\\windows\\kafka-console-consumer.bat --topic <topic-name> --bootstrap-server <host>:<port> --from-beginning
This will return all messages from the start of the topic’s inception. You can consume only new messages from the topic by removing the --from-beginning flag.
Here is what the producer (left) and consumer (right) look like from a terminal perspective:
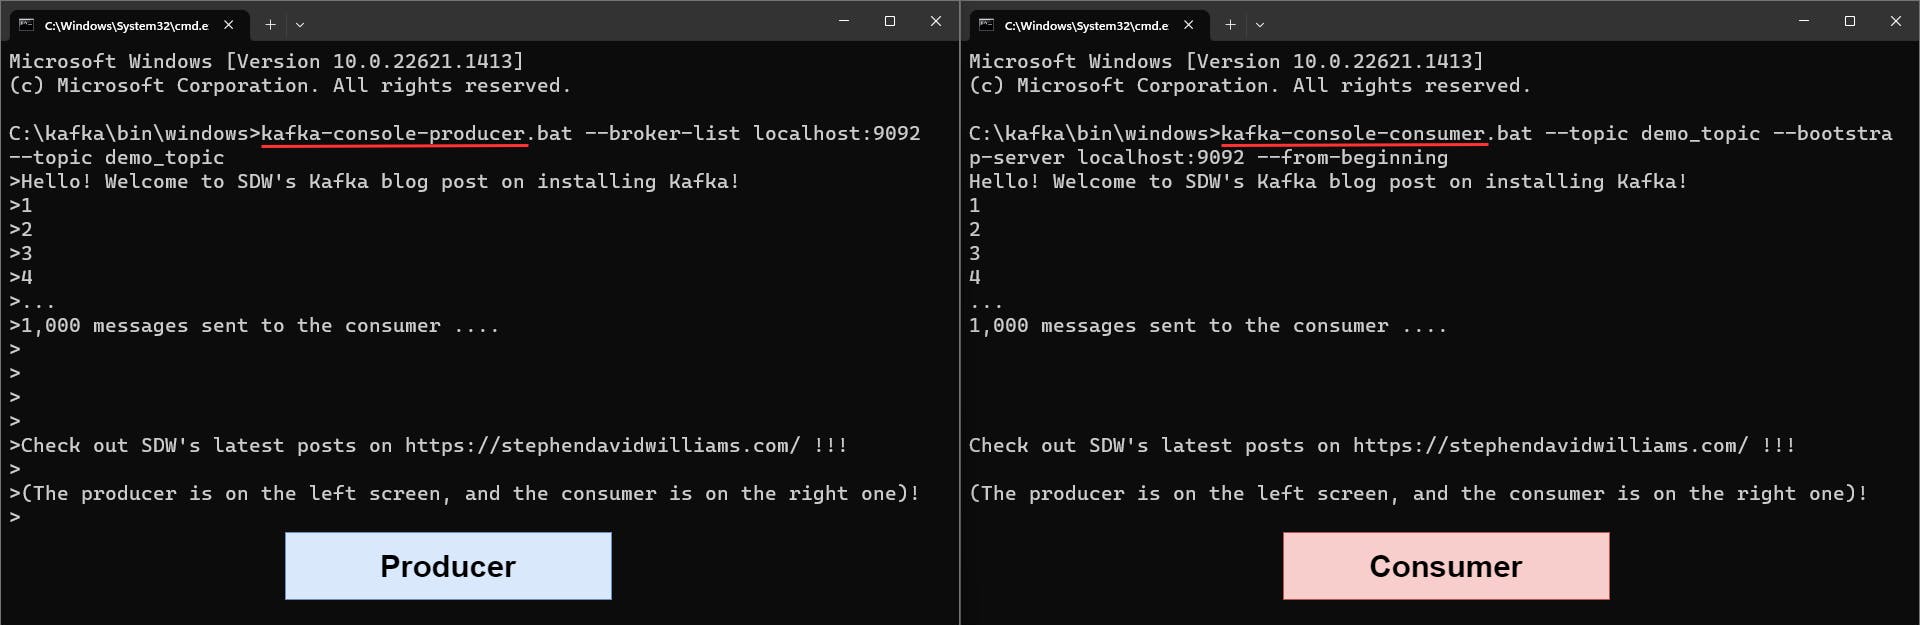
Note: the terminals can be opened in an IDE like VS Code too, which makes it easier to manage multiple terminals in one session.
Congrats! You have successfully installed and configured Kafka on your machine🎉!
Delete a topic
If you want to delete a Kafka topic, you can also run this command:
C:/kafka/bin/windows/kafka-topics.bat --bootstrap-server <host>:<port> --delete --topic <topic_name>
Replace the <host>:<port> with localhost:9092 and <topic_name> with demo_topic once you’re done. Once you’re comfortable with the whole process, you can configure the host, port, topic name and other variables to your preferences.